If you use WordPress and you do not know the Jetpack plugin we can't help but recommend you to fill this huge gap by reading the excellent guide on sos-wp.it or, if you prefer, by directly going to the official Jetpack website. I'll just say that we're talking about a very powerful (and very useful) plugin that will empower your WordPress-enabled website with a lot of useful features, most of them identical to those available to WordPress.com paid accounts.
If you stumbled across this article is however likely that you know very well not only Jetpack but also one of its most interesting modules: I'm talking of Publicize, which gives us the power to automatically share our WordPress posts over the most popular Social Networks: needless to say that, in order to use such feature we need to link our Social accounts to our WordPress + Jetpack installation, allowing the latter to publish to the former ones while using our identity.
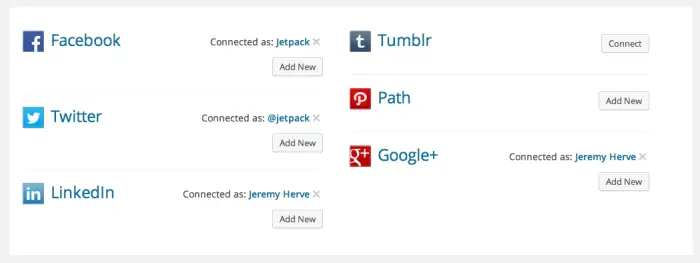
The plugin work perfectly and it's easy to configure. As soon as we activate it we'll be able to link all our social accounts through its configuration screen:
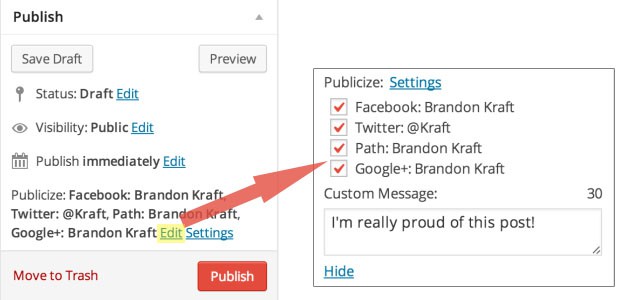
If we do this, every time we'll come to the point to publish a WordPress post we'll be able to also publish that using our linked Social Networks accounts - and also choose a custom text, hashtags and/or URL - using a handy Widget that will be added to those already present in the right column:
The only limitation so far is that Publicize module does not allow you to share already published posts. This restriction applies not only to the post published before installing Jetpack and activating Publicize, but also for any post already published and/or shared by it. This basically means that you only have a single chance to do it in the right way: if you forget an hashtag or do any mistake you won't be able to recover. The next time you'll try to edit an already-published post you'll see that the Publicize checkboxes of each linked Social Network will be unselected and disabled, making it impossible to select them again.
The solution
Fortunately the issue can be fixed with a simple workaround, provided you have access to the filesystem that hosts our WordPress website: that's because we'll need to apply a small code change to one of the .php module files. The file we need to edit is the following:
|
1 |
/wp-content/plugins/jetpack/modules/publicize/ui.php |
Open the file with a text editor and find the following line of code (usually around line 540, depending on the installed Jetpack version):
|
1 |
$service_id_done = (array) get_post_meta( $post->ID, $this->publicize->POST_SERVICE_DONE, true ); |
Immediately below this line you need to add the following:
|
1 2 |
// EDIT: Allow Publicize to process already-published posts $all_done = false; $service_id_done = false; |
This fix will disable the checks whether the current post has already been published or not. Once done, all you need to do to re-enable Publicize settings is to change the status of any post from Published to Draft and then click Update: as soon as the page reloads itself you'll be able to publish the post while specifying all the Publicize options you want to perform.
UPDATE: If you want to make Publicize to automatically add some hashtag to your posts without having to manually insert them every time, check out this plugin.
That's all for now. Happy coding!


Hi Ryan, I’m stoked you found a way to edit this problem of not being allowed to re=share a previously published post.
And I tried your code:
// We don’t allow Publicizing to the same external id twice, to prevent spam
$service_id_done = (array) get_post_meta( $post->ID, $this->publicize->POST_SERVICE_DONE, true );
But it didn’t work–gave me the “white screen of death”. Can you let me know when you fix this? I’d love to use it!
Hello, please see my other replies regarding this issue.
I am also getting the white screen of death once I add the code as described. All I can do is remove it. Any ideas?
Hello, your issue could be related to an older version of PHP by any chance? (see my other replies). Please try the following:
$all_done = false; $service_id_done = false;
Let me know if it fixed it.
I updated the post as well, since this way to define vars is definitely safer than the previous one.
I followed the steps as you mentioned here. Now the site isn’t working. I’m unable to revert back as I cannot to the site.
“The http://www.XXX.com page isn’t working
http://www.XXX.com is currently unable to handle this request.
HTTP ERROR 500″
Hello, I just tried my one-line code snippet (which is a very simple variable set) and it worked like a charm. The reason for your 500 could be the fact that you have an older version of PHP which doesn’t support multiple variable assignments at once.
Please try the following. Instead of doing:
$all_done = $service_id_done = false;
try to do this:
$all_done = false; $service_id_done = false;
Let me know if it fixed it. Also ensure that there are no spaces between variable names, such as:
$all__done
which is something that could easily throw a 500.
Thanks for sharing this with us. I updated the post as well, since this could be an issue for many readers.
After adding the code the Publicize menu does allow me to check boxes but when I click Publish nothing happens on my social media! I’ve tried with a fresh test page (works) and I’ve tried editing the publish time on old posts (doesn’t work). Any ideas?
Also having the same problem.
same problem
Same problem here.
Thanks Ryan, I am really surprise that why the past commentetors getting errors in using the above code.
For me, it worked for my site https://www.elkeesmedia.com and I am really thankful to you to share this code with us.
Wooooww… This code works… Really thanks so much Ryan…