Table of Contents
Have you ever heard about Superfish? If you're a System Administrator, you probably do. However, here's a quick recap: Superfish was an advertising company based in Palo Alto, California: it became famous (or we could say "infamous") on February 20, 2015, when the United States Department of Homeland Security advised uninstalling its "flagship" adaware software and its associated root certificate, because they make computers vulnerable to serious cyberattacks, including interception of passwords and sensitive data being transmitted through browsers: within that same day, Microsoft released an update for Windows Defender which removes Superfish.
How could a "simple" adware software tool cause so much havoc? The reason is quite simple to explain and understand: in this post we'll try to shed some light on the matter, explaining the problems related to a serious HTTPS-related security issue that happened a lot of times in the past, as well as providing some hints to prevent Windows users from having to deal with that in the future.
Root Certificate issues
The Superfish software installation included a universal self-signed certificate authority; such certificate authority allows to perform a man-in-the-middle attack to introduce ads even on encrypted pages. The certificate authority had the same private key across laptops; this allows third-party eavesdroppers to intercept or modify HTTPS secure communications without triggering browser warnings by either extracting the private key or using a self-signed certificate.
In a nutshell, the actual threat behind Superfish lied in the fact that such tool installed an unsafe Root Certificate on users computers without their knowledge: this basically means that when a user visits an HTTPS site, the site certificate is signed and controlled by Superfish and falsely represents itself as the official website certificate. Such behaviour was even more critical by the time it was discovered because the Superfish adware tool was part of the pre-installed software bundle shipped by Lenovo to their laptop and desktop PCs, with every single installation sharing the same private encryption key. Such insecure behaviour allowed any attacker to use such key to certify imposter HTTPS websites, meaning that those PC will fail to detect rogue websites with unsigned TLS certificates: a red-flag issue that completely undermines the whole meaning of HTTPS protection.
Superfish-like episodes
Unfortunately, the issue with Superfish wasn't an isolated case: in the last 15 years there have been several other cases of software applications with the habit of installing root certificates without notifying the user, such as:
- eDellRoot, a rogue Certificate that could be found on most new Dell laptops and desktop computers because it was installed by the built-in Dell Foundation Services application (read here fo details).
- PrivDog, a tool shipped by Comodo that came with a flaw even worse than the one packed with Superfish (read here for details).
- Ad-Aware Web Companion, another adware tool by LavaSoft (the company behind Ad-Aware Antivirus) which used the same Komodia engine used by Superfish (with the same flaw: read here for details).
... And the list can go on: the same "SSL-busting" code used by Superfish/Komodia was found in a dozen more apps (read here for more details) since 2015: now, although most of them have hopefully been fixed or removed from the web, there is no guarantee that similar problems will not recur in the future. As a matter of fact, any software tool can ask the user to install a root certificate during its installation phase: and the worst thing is that there's a good chance that most users will simply click "Yes" and allow such practice out of distraction - or simply because they don't know what risks they run into.
Sysinternals SigCheck to the rescue
Luckily enough, there's a Microsoft official tool that can be used to quickly scan your system and inform you if any certificates are installed that aren’t normally trusted by Microsoft. The name of the tool is SigCheck and it's part of the Sysinternals set of tools focused on Microsoft Windows security management and operations.
In the following sections we'll explain how to use it to check for rogue root certificates, which is a rather simple task for any average Windows user: it's an especially good idea to run this on new computers to check if they’re open to attack out of the box.
Getting SigCheck
SigCheck can be downloaded from Sysinternals official website, together with all the other Sysinternals tools: once there, you can choose from downloading the zip file containing all of their utilities, or just grabbing the zip file for the individual application that you want to use by browsing the left-side menu (SigCheck is under File and Disk utilities): if you just want to get it, here's the direct download link.
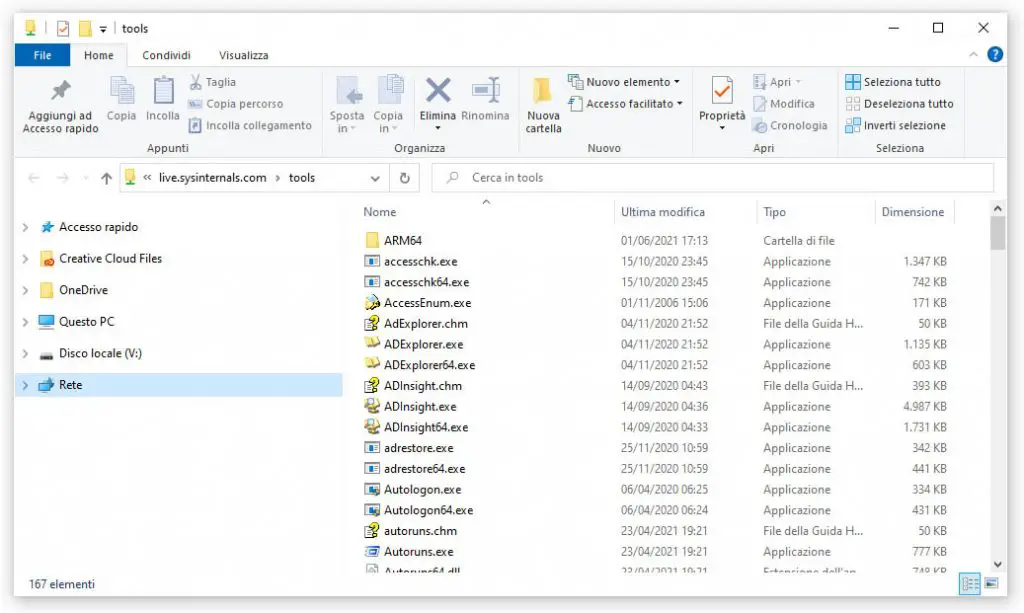
Alternatively, you can get (or even use) SigCheck from the SysInternals Live share, a unique way to distribuite free software created by Sysinternal staff: it's basically a public Windows file share that anyone can access through the Internet (!). This basically means that you can simply use the Windows Run tool (by hitting the WIN+R key combo) and then type \live.sysinternals.com\tools\ into the textbox to access all Sysinternals utilities: or you can directly launch the Windows File Explorer tool and type it there, if you prefer.
In both cases you'll end up accessing the Sysinternal shared folder contents, as shown in the following screenshot:
From here you can either run the apps, copy them to a local folder and launch them, and so on. Since we want to use SigCheck, we can choose the latter option and then run the command in the following way:
|
1 |
sigcheck64 -tv |
This will launch the SigCheck's x64 executable: In the unlikely case you're still using a x86 CPU based machine, you should use the 32-bit version in the following way:
|
1 |
sigcheck -tv |
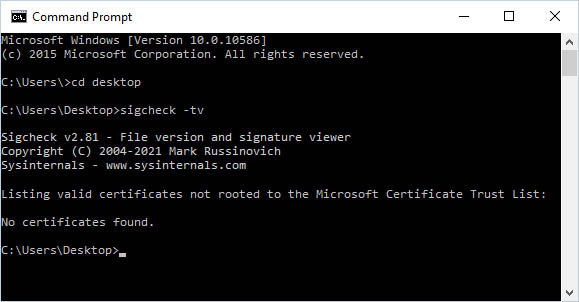
The -t switch, without other options, will dump contents of all machine certificate stores: in case you want to query the user store, you can use the -tu switch instead. As you can see from the above commands, we've also appended the -v switch to have Sigcheck download the trusted Microsoft root certificate list and only output valid certificates not rooted to a certificate on that list.
In other words, the -tv switch will have Sigcheck download a list of trusted certificates from Microsoft and compare it to the certificates installed on your computer. Here's what it can happen next:
- if everything is good and you don’t have any rogue certificates, you’ll see a No certificates found message.
- if there are any certificates on your computer that aren’t on the Microsoft Certificate Trust List, you’ll see them listed here.
What to do with untrusted Certificates?
If the SigCheck tools lists one or more certificates after you run the command and you’re not sure what they are, you can try performing a web search for their names to find out what they are and how they got there. Removing them manually isn't always required - they can be there for a good reason: for example, they can be installed by a program running on your computer. If that's the case, you need to check if you trust that program in order to ensure it's not yet another Superfish-like software (!); furthermore, keep in mind that uninstalling the certificate could fix the issue only temporarily, since the software could just reinstall the certificate right after you remove it.
For this very reason, the best thing you can do is to properly identify which program is causing the problem and - if you're not sure its behaviour is legit - get rid of that program entirely.
Conclusions
That's it, at least for now: we sincerely hope that this post will help other System Administrator and/or Windows users to check for rogue root certificates on their Windows machine and (hopefully) get rid of them, as well as the untrusted software that installed them.


