Table of Contents
If you are a software developer and you don't know Electron as of today, you definitely should start to gather some info about it. In very short words, Electron - formerly known as Atom Shell - is an open-source framework designed to build desktop GUI applications using HTML, CSS and JavaScript. To put it in other words, it allows web developers to use their existing knowledge to create native desktop clients for the most used operating systems - including Windows, Linux, MacOS and so on. The project is developed and maintained by GitHub and runs using Node.js runtime for the back-end part and Chromium for the front-end.
The framework has been released in 2013 and immediately gained a lot of attention among the various web (and non-web) developers communities due to its simplicity and easeness of use. As a result of that, a lot of desktop application built with Electron have been released in the latest few years, including - yet not limiting to: Atom, Discord, Keybase, Microsoft Teams, Microsoft Visual Studio Code, Shift, Slack, Signal, Twitch.tv, WhatsApp, Yammer, and even Skype.
For all the above reasons, in the unlikely scenario that you never heard about it, you definitely need to catch up. That's precisely why we're publishing this post: in the upcoming paragraphs we will show you how to setup and configure your first Electron project in Visual Studio 2017 and how to create your first Electron application using the "Hello World" sample available with the official electron-quick-start GitHub project.
Installing Prerequisites
For the sake of simplicity, we'll take for granted that you already have Visual Studio 2017 Community (or Enterprise, or Visual Studio Code) installed on your development machine. If that's not the case, install it before continuing.
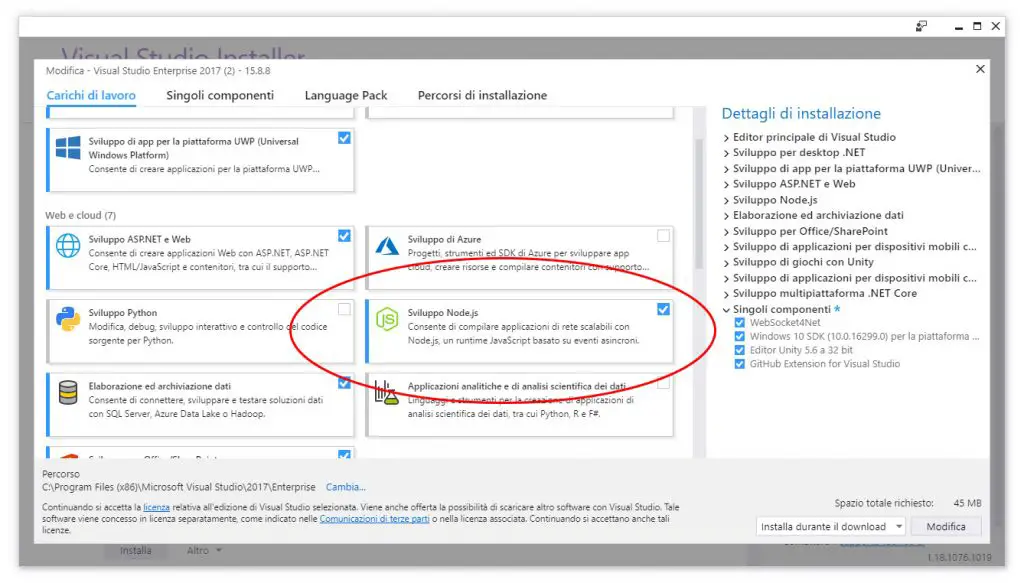
Since Electron does require Node.js, the first thing to do is to open the Visual Studio 2017 installer and check that the Node.js development tools are installed: if they're not, be sure to install them.
That way you won't need to install Node.js separately, as VS2017 will install it for you; on top of that, you will get the Node.js Visual Studio templates, which we'll be using in a few.
Creating the Project
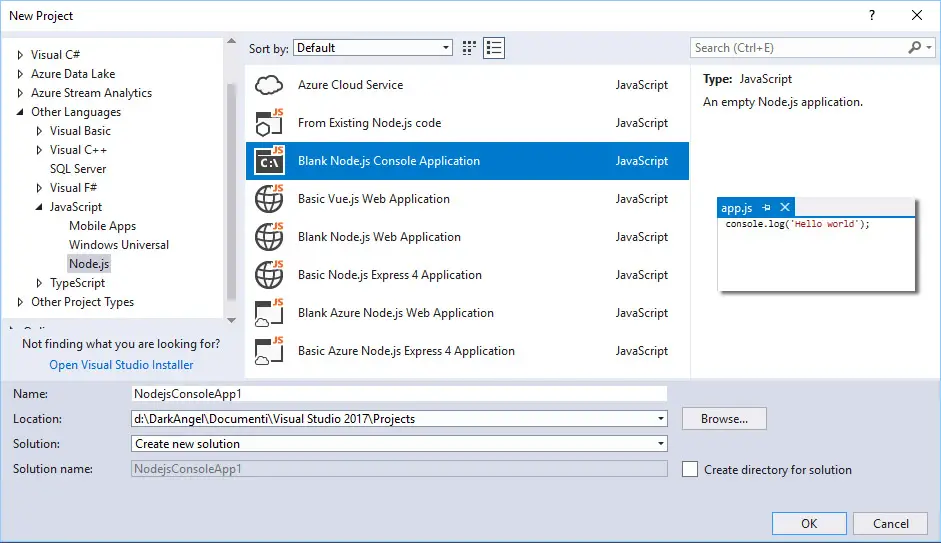
The next thing you have to do is launch Visual Studio 2017 and create a new Blank Node.js console application:
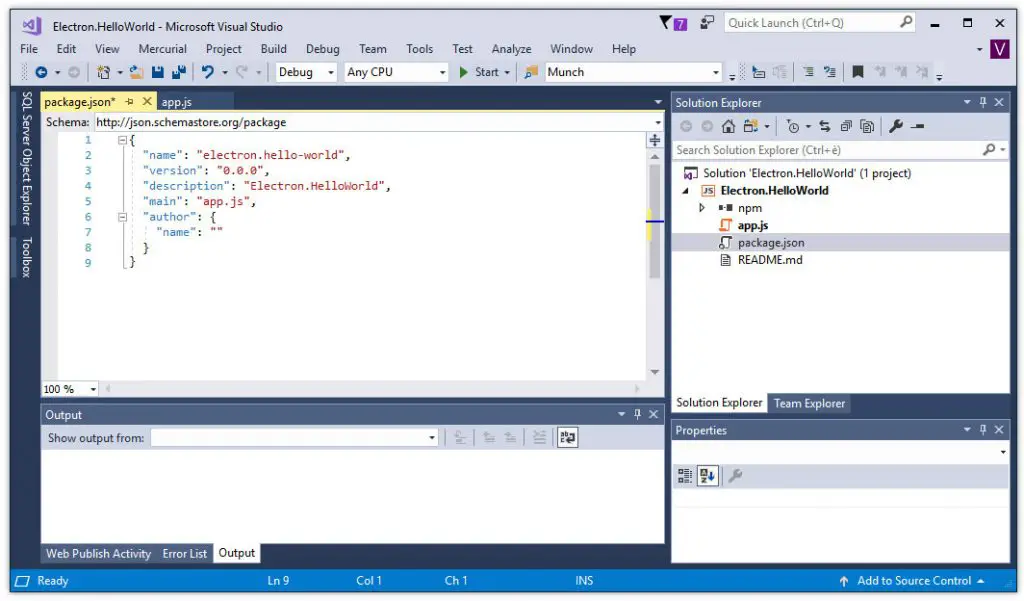
Choose a suitable name for your project and solution files (we used Electron.HelloWorld for both of them) and click OK. As soon as you do that, the project will be properly initialized by Visual Studio: you will see a typical Node.js minimalistic boilerplate with a single app.js file, a package.json file and basically nothing more.
Adding Electron
Open the package.json file and add the following lines to the JSON object included there:
|
1 2 3 4 5 6 7 8 9 10 11 12 13 14 15 |
{ "name": "electron.hello-world", "version": "0.0.0", "description": "Electron.HelloWorld", "main": "main.js", "scripts": { "start": "electron ." }, "author": { "name": "" }, "dependencies": { "electron": "3.0.6" } } |
We're using Electron v3.0.6 because it's the latest stable at the time of writing.
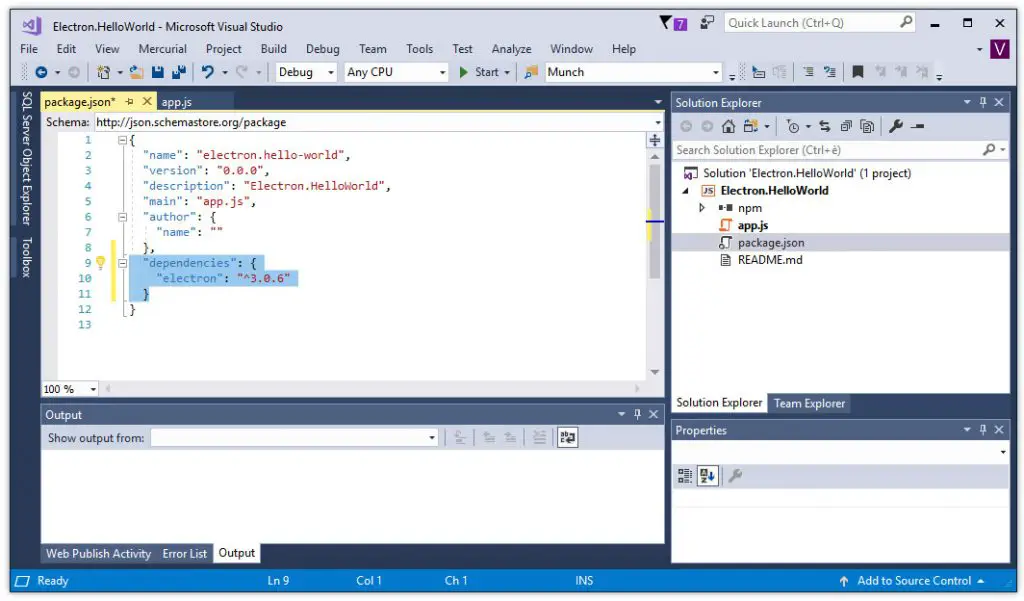
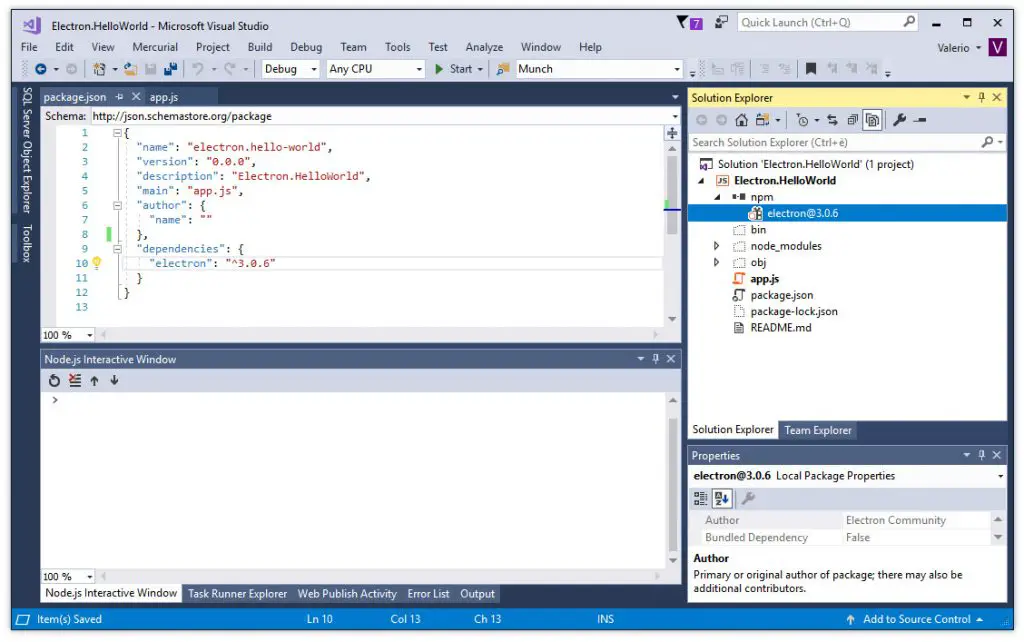
Your updated package.json file should look close to the screenshot below:
While you're here, you can take the chance to change your application name, version, description.
Once you're done with your edits, save the package.json file and wait for NPM to update your packages: in case it doesn't fire automatically, you can trigger the update manually by using the Build > Update all bundles option from the topmost menu.
Here's what your project should look like after the update:
If all went well, you should be able to see the Electron package under the npm folder, as well as the nodule_modules hidden folder; in order to see the latter, you'll have to enable the Show All Files feature in Solution Explorer.
Once done, right click to the project node and open the Properties panel to configure the Node.js executable path. Actually, since our Node.js project will need to use Electron, we need to configure that path to point to the Electron executable file instead:
The path, as you can see from the above screenshot, would be \node_modules\electron\dist\electron.exe from your project's root folder.
Hello World console sample
Now that we properly added and configured Electron, we're ready for our first "Hello World" test!
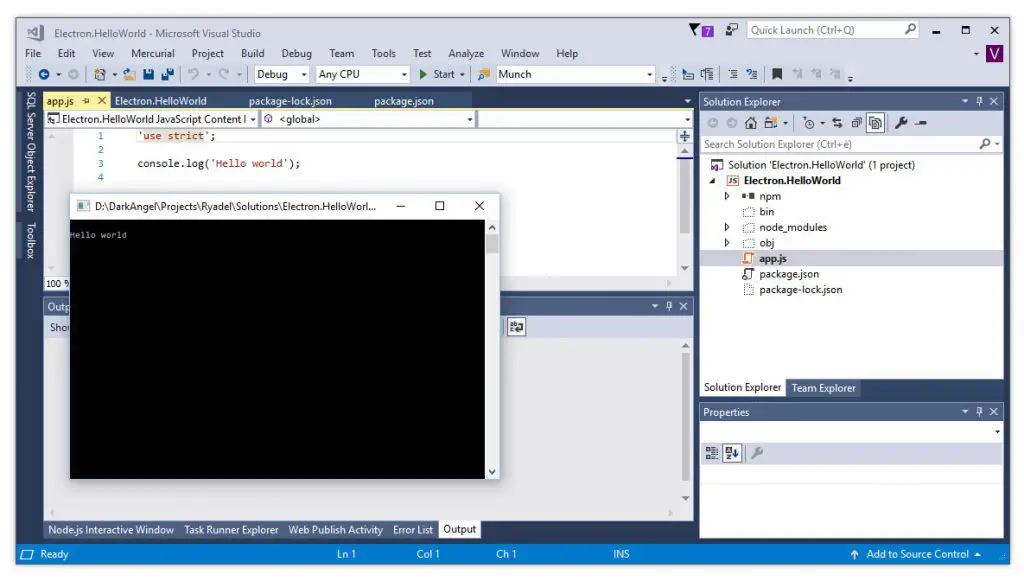
Hit F5 and you should be able to see the following:
As we can see, this is clearly a "console" test, as expected by our template's app.js file content - a simple console.log command: definitely not fancy, yet it works!
Adding the GUI
In order to bring the GUI in, we need to tell our Electron app to instantiate a HTML page instead than using the console.log. Let's see how we can do that!
Save your project/solution file, then close Visual Studio 2017 (very important!).
Once done, Launch your favourite browser and navigate to the electron-quick-start GitHub project; use the clone or download GitHub feature to fetch a copy of the whole project on your local hard-disk drive as a single compressed file.
Extract everything in a separate folder, then copy the following files inside your Visual Studio 2017 project root folder, replacing the existing ones:
- index.html
- main.js
- renderer.js
Updating the Project
Launch Visual Studio 2017 again, reload the Node.js console project you created a minute ago and perform the following steps:
- Delete the app.js file (you don't need it anymore).
- Right-click to the main.js file and select Select as node.js Startup file (or, if you prefer, manually change the Startup File value in the project's Properties page).
- Change the "main" parameter value in the project.json file from app.js to main.js.
Alternatively, you can also replace the app.js content with the main.js content and then delete the main.js file, skipping the three steps above.
Hello World GUI sample
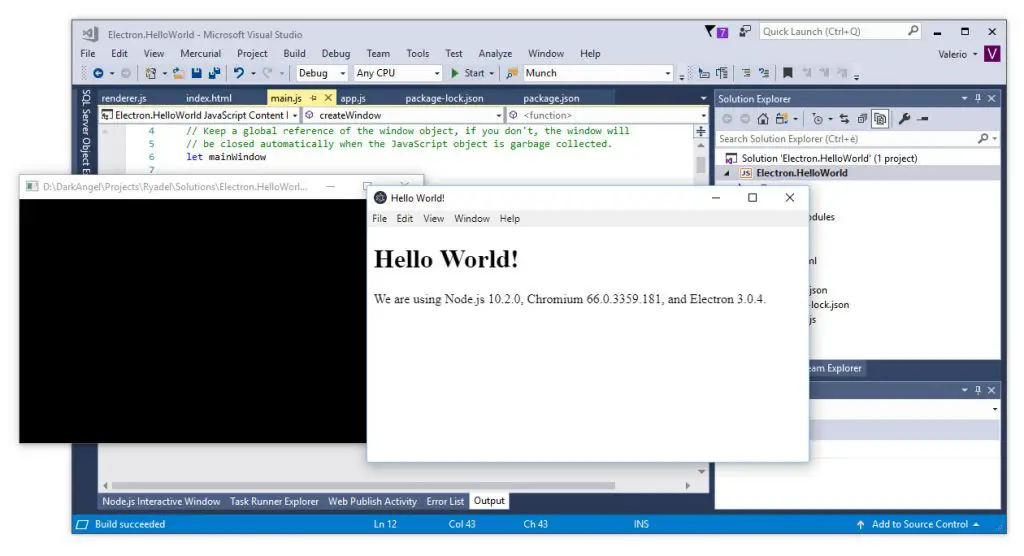
Hit F5 to perform a second Hello World test: this time our application should appear in all its HTML glory!
Troubleshooting
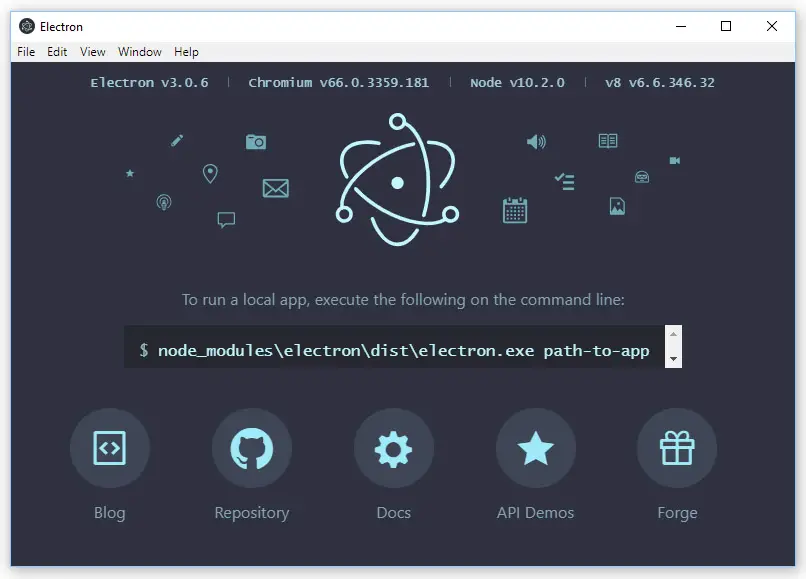
In the latest versions of Visual Studio 2017 we experienced a strange bug (arguably a permission issue) that makes the application unable to open the index.html page, thus loading the Electron default page instead:
In order to fix that, open the main.js file and replace the following line:
|
1 |
mainWindow.loadFile(`index.html`); |
with this line:
|
1 |
mainWindow.loadURL(`file://${__dirname}/index.html`); |
That should fix that for good.
Conclusions
That's it, at least for the time being: we'll definitely write more about Electron in the near future, because it's definitely one of the most promising development framework that we have seen in a while. Meantime, if you want to know more about it, we strongly suggest to take a look to the Electron official page and to the online docs.





Hi the last part is not very correct, “mainWindow.loadURL(path.join(__dirname, ‘index.html’));” it should be used instead
Great article! Thank you