Table of Contents
In this post we'll review Tenorshare 4DDiG, a fully featured Data Recovery Software for Windows and Mac that can help anyone to perform a (sadly) frequent task for anyone who's actively using a PC or laptop device for a considerable amount of time: recover deleted data.
As you most likely already know, data recovery is the process of salvaging any kind of data that became (or was made) unavailable and inaccessible due to various possible reasons: corrupted, damaged, deleted, formatted, and so on. Such data was usually stored in the filesystem of a typical storage media, such as internal or external hard disk drives (HDDs), solid-state drives (SSDs), USB flash drives, magnetic tapes, CDs, DVDs, RAID subsystems, and other electronic devices.
The "loss" of such files might be due to physical damage occurred to the storage device (often due to some kind of mechanical fault), or logical damage to the file system itself, which might prevent the host operating system from accessing the file or to mount the storage unit where it was stored. When this type of eventuality occurs, software such as Tenorshare 4DDiG comes into play, allowing the recovery of the aforementioned data either on their original storage media (if the problem concerns the individual files) or on other drives (if the problem is with the storage drive).
Features
The software comes in two editions: Free and Professional. The two editions come with the same set of features:
- Recovers deleted photos, videos, and other files
- Recover from any common position, such as: Desktop, Recycle Bin, Documents & Settings folder, and so on
- Recover from any storage media
- BitLocker Data Recovery
- Recover from formatted systems
- Recovers data from raw partition
However, the Free edition can only scan the chosen media for recoverable data: in order to actually recover the found files you will have to purchase the Professional edition, which comes with three available license plans:
- 1-Month license: $45.95
- 1 Year License: $49.95
- Lifetime License: $59.95
All license plans are valid for a single PC (or Mac) only. If you want to purchase multi-pc licenses you can ask for a custom quotation from the Buy Now page.
File Types
Both editions allows to recover more than 1000 different data types, including:
- Image/Photo: JPG/JPEG, TIFF/TIF, PNG, BMP, GIF, PSD, WEBP, CRW, RGB, CR2, NEF, ORF, SR2, MRW, DCR, WMF, RAW, SWF, SVG, RAF, DNG, ERF, ICO, DSC, etc.
- Video: AVI, MOV, MP4, M4V, 3GP, 3G2, WMV, MKV, ASF, FLV, FLA, AMV, F4V, SWF, MPG, RM/RMVB, MPEG, TS, VOB, MTS, DV, etc.
- Audio: MP3, AIF/AIFF, M4A, WMA, WAW, APE, MID/MIDI, VQF, OGG, AAC, WAV, FLAC, DTS, and other audio formats.
- Documents: DOC/DOCX, XLS/XLSX, PPT/PPTX, CWK, HTML/HTM, INDD, EPS, RTF, EPUB, PDF, CHM, CSV, TXT, DOTM, THMX, and so on.
- Archives: 7Z, WAR, ZIP, EXE, 7zip, BZ2, ISO, IMG, TAR, GZ, TAZ, etc.
- EMail: MSG, PST, OST, EML, EMLX, MBOX, etc.
- DB/Sources: ASPX, CGI, ELM, IGY, IQY, JSP, LDB, MHT, MHTML, PHP, and more.
System Requirements
The hardware and software requirements vary depending on the build version (Windows or MacOS).
Windows
- Supported OS: Windows 11, Windows 10, Windows 8.1, Windows 8, Windows 7
- File system: FAT16,FAT32,exFAT,NTFS
- CPU: 1GHz (32 bit or 64 bit) or above
- Disk Space: 200 MB or more free space
- RAM: 512 MB or more
MacOS
- Supported OS: macOS Monterey, macOS BigSur 11.0, macOS 10.15, macOS 10.14 (macOS Mojave), mac OS X 10.13 (High Sierra), 10.12(macOS Sierra), 10.11(El Capitan), 10.10 (Yosemite)
- File system: APFS, NTFS, HFS+
- CPU: 1GHz (32 bit or 64 bit) or above
- Disk Space: 200 MB or more free space
- RAM: 512 MB or more
Test Drive
To perform our test drive we've used the Free edition of Tenorshare 4DDiG for Windows: if you need a test drive for the MacOS edition, feel free to let us know! We'll be more than happy to write a nother article fully dedicated to Tenorshare 4DDiG for Mac.
Download and Installation
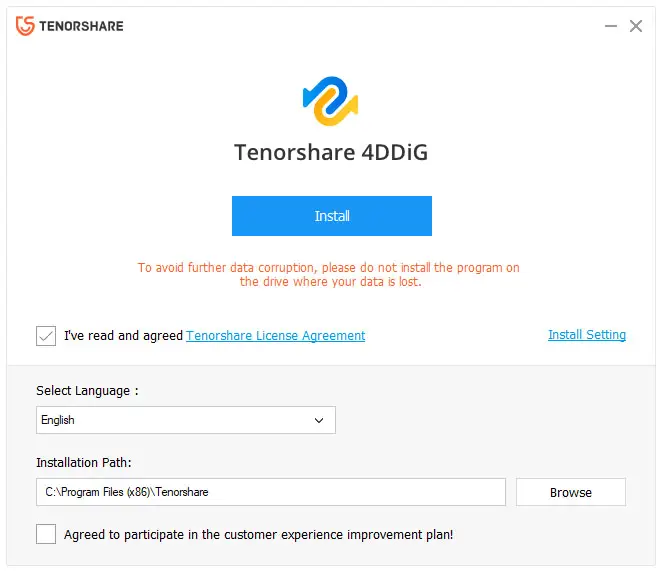
In our test drive we've used the Free Edition of the software, which can be downloaded from the product's official website (Free Download 4DDiG). Once the download is done, we can click to the executable file to start installing the software.

Once we fill up everything, we can hit the Install button to actually install the software on the chosen path.
As soon as we do that, the software will immediately launch a quick scan, which can take some minutes to complete - depending on the choosen media size, speed and number of deleted files. In our example it took a lot to complete since we do have a huge number of deleted files (!)
The file browsing task can be done using one of the two provided views:
- Tree View: a view that groups all the found files into three logical categories: Existing Files (files that have never been deleted before), Lost Locations (files that were present in locations/paths that are now unavailable) and Deleted Files (accidentally deleted files).
- File View: a view that groups all the found files for file type and extension.
In our personal experience, the File View has proved to be the most effective one, at least when we know the type of the file(s) we're trying to recovery.
Once the scan has been completed (or has been stopped), we can select the file(s) that we want to recover using the UI interface provided, as shown in the screenshot below:
When we're ready, we can click to the Recover button and get our file(s) back.
Official Video Tutorial
In case you don't want to read our test drive, you might want to visit the Tenorshare 4DDiG YouTube Channel, which is full of 3-minute tutorials on how to use the software. For example, here's a tutorial explaining how to fix a corrupted hard-drive.
Conclusion
All in all, our personal experience with Tenorshare 4DDiG went really smooth: we can definitely recommend this software to anyone who's looking for an affordable and convenient way to retrieve deleted, formatted or lost data from your computer or memory card with ease.

