Table of Contents
If you're a .NET developer working with Visual Studio, you'll most likely know SQL Server LocalDB: a specialized edition of the well-known Microsoft SQL Server engine - firstly introduced in SQL Server Express 2012 - acting as a minimal, on-demand, version of SQL Server designed for application developers. Since its first introduction LocalDB has proved itself to be a great development tool, especially when used as an "embedded database" to quickly test our Data Model without having to setup a whole DBMS service. We briefly talked about it in a couple posts some months ago, such as when we compared the Entity Framework Data Modeling patterns (Code-first, Model-first and Database-first) and in our ASP.NET MVC 5 Web Application Project Setup Guide.
Although LocalDB proved itself to be a great development choice, it's not a good idea to use it in a production environment of any kind. The reasons for that are fairly simple to explain and understand:
- Despite having the same performances of a regular SQL Server Express instance - since they share the same database engine - the LocalDb underlying process will shut down itself if it doesn't have any request for a while. When this happens, the next request(s) will most likely have poor performance and could even get a timeout.
- There are some (minor and fixable) issues with the LocalDB default user profile and permissions that you'll need to fix to use it with an IIS-based production website: for further info about these problems - and their workarounds - I strongly suggest to take a look to this great two-part MSDN blog post (part 1 | part 2).
The "LocalDB in production" debate is also a recurrent topic on tech sites such as StackOverflow, which hosts some really interesting threads providing a great analysis of the pros and cons, such as:
- Is it normal to use LocalDb in production?
- Since LocalDB is for development purpose, then use what DB for production?
Having read and said all that, here come my 2 cents: although LocalDB is great, for a production machine I would strongly recommend using a standard, full-fledged and service-based instance of SQL Server: as for the chosen edition, we can either go for Express, Web, Standard, or Enterprise, depending on what we need and/or can afford.
In this post we'll see how to properly setup and configure an instance of Microsoft SQL Server 2017 Express Edition, aka MSSQL2017, which can be downloaded for free from this Microsoft page. Needless to say, we need to install it on a machine that is reachable from our web server via a Local Area Network (LAN) or within the web server itself, although this is definitely not a recommended choice: both IIS and SQL Server are resource-intensive, hence it could be advisable to keep them in two separate environments.
Installing SQL Server 2017 Express
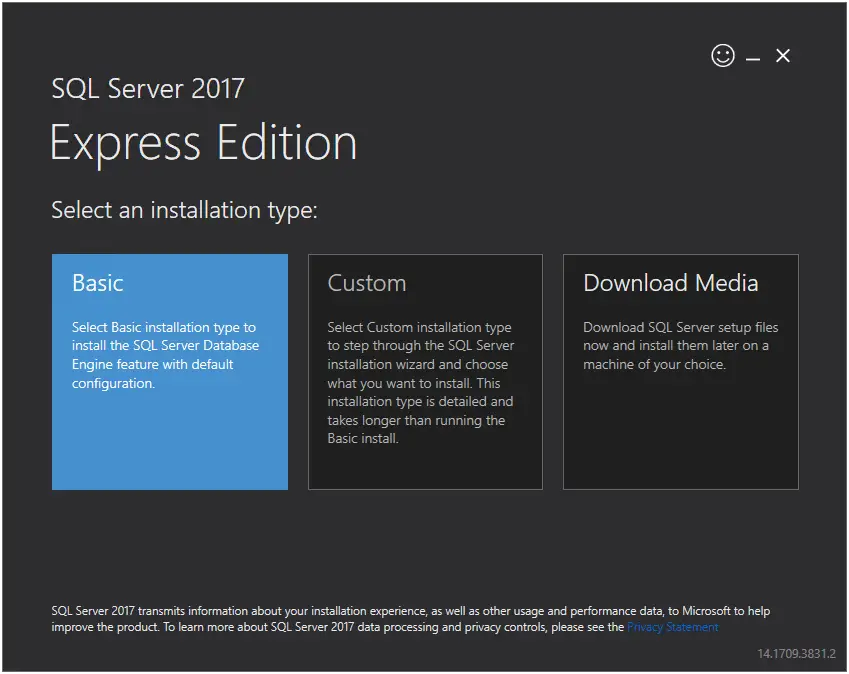
The installation process is pretty straightforward. Unless we don't need anything specific, we can just go for the basic type:
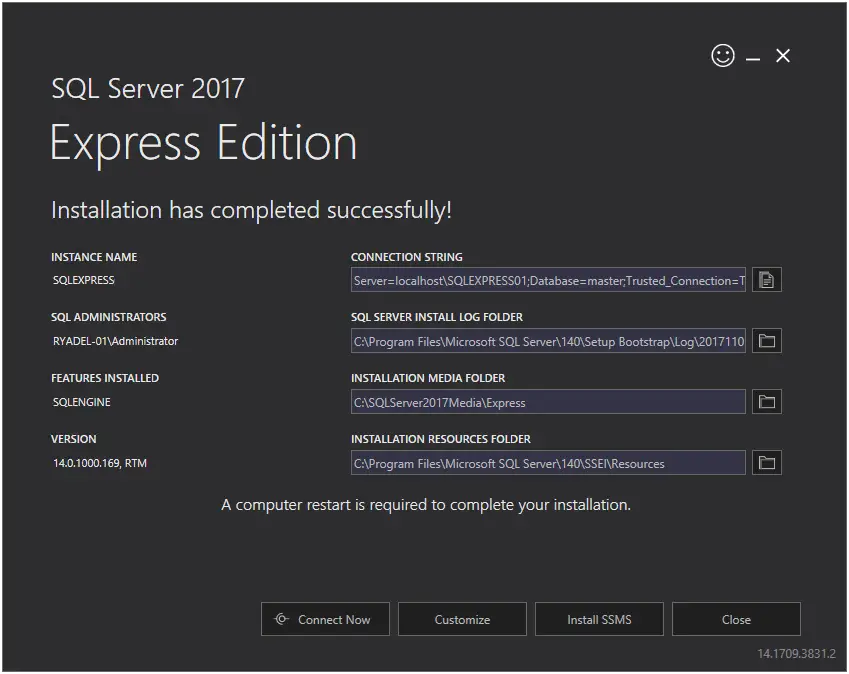
Eventually, we'll be prompted with the Installation Complete window, which will also give us some useful info, including the database instance name and a default connection string ready for a connection test:
Installing SQL Server Management Studio
From here, we can click the Install SSMS button and download SQL Server Management Studio, a tool that we can use to create our fist sample database and also a dedicated user that can access it.
SQL Server Management Studio is a separate product and can also be retrieved for free download at the following URL.
Configuring the MSSQL Service
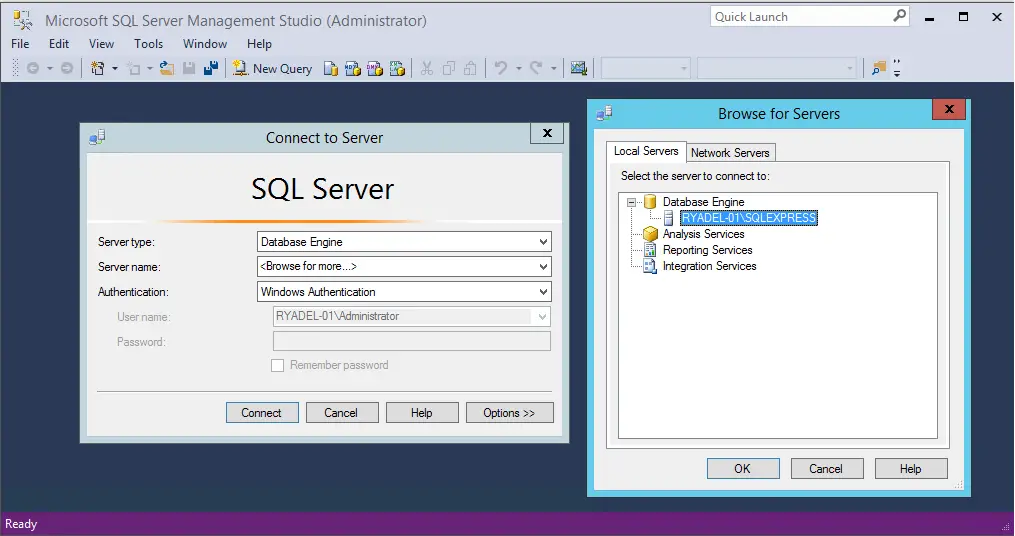
Once we've downloaded and installed it, we can launch SQL Server Management Studio and start the required steps to create our first database. We will be prompted by a Connect to Server modal window that will allow us to connect to our local SQL Server instance.
To do this, select the Database Engine server type and then, from the Server name combo box, choose <Browse for more...>. Another pop-up window will appear, from which we'll be able to select the database engine we just installed on our server:
As for the Authentication part, we can leave Windows Authentication for now, being it the default SQL Server authentication mode: however, we're going to change it soon enough.
When we're done, click on the Connect button and a Server Explorer window will appear, containing a tree view representing the structure of your SQL Server instance. This is the interface we'll use to create our database and also the user/password that our application will use to access it.
Changing the authentication mode
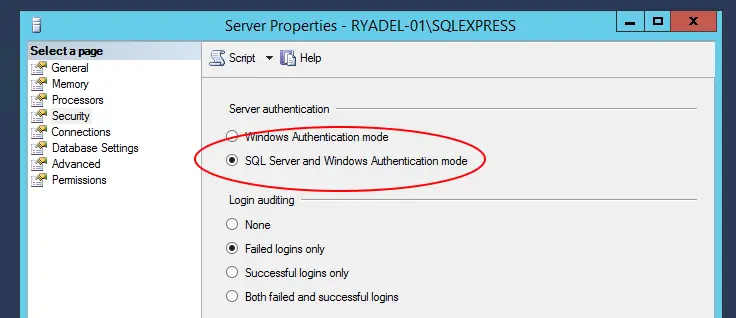
The first thing we need to do is to change the default SQL Server authentication mode, so we won't be forced to use an existing Windows account. To do so, right-click on the root tree view node, which represents our SQL Server instance, and select Properties from the contextual menu. From the modal window that appears, select the Security page, then switch from Windows Authentication mode to SQL Server and Windows Authentication mode:
Adding the TestMakerFree database
Now we can create the database that will host our application's tables. Right-click on the Databases folder and choose Add Database from the contextual menu. Give it the TestMakerFree name and click on OK.
Adding the TestMakerFree login
Go back to the root Databases folders, then expand the Security folder, which should be just below it. From there, right-click on the Logins subfolder and choose New Login. Again, give it the TestMakerFree name. From the radio button list below, select SQL Server Authentication and set a suitable password - for example, SamplePassword123$ - and click on OK. If you want a simpler password you might have to also disable the enforce password policy option. However, we advise against doing that: choosing a weak password is never a wise choice, expecially if we do that in a production-ready environment. Instead, replace the sample password we used above with a custom one and store it carefully: we're going to need it later on.
Mapping the login to the database
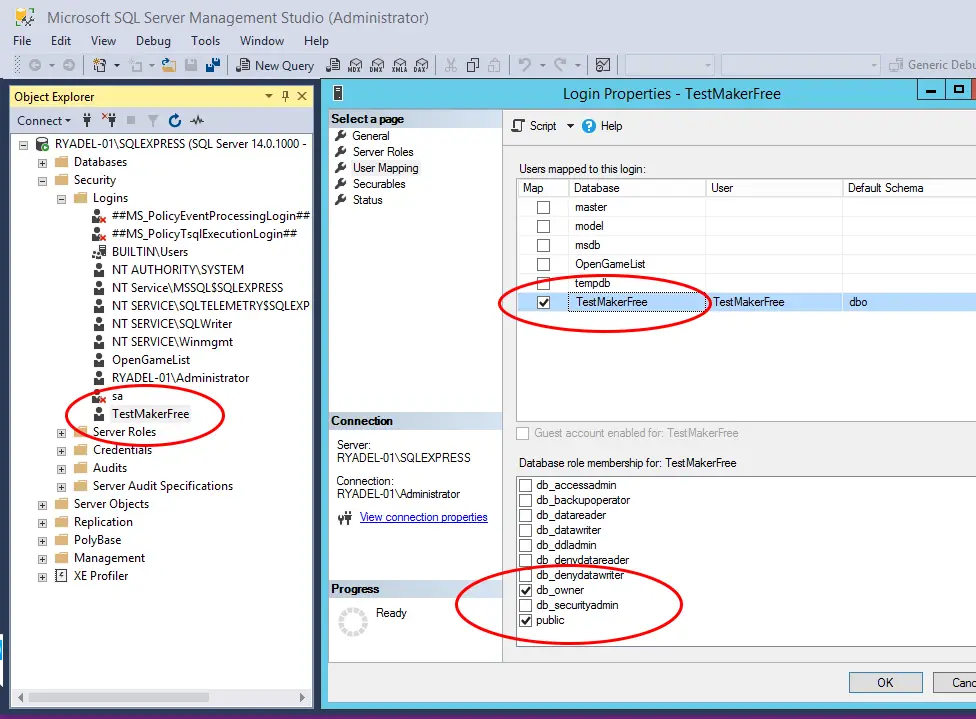
The next thing we need to do is to properly map this login to the TestMakerFree database we added earlier. From the navigation menu to the left, switch to the User Mapping tab. Click on the checkbox right to the TestMakerFree database, then write TestMakerFree in the User cell and assign the db_owner membership role:
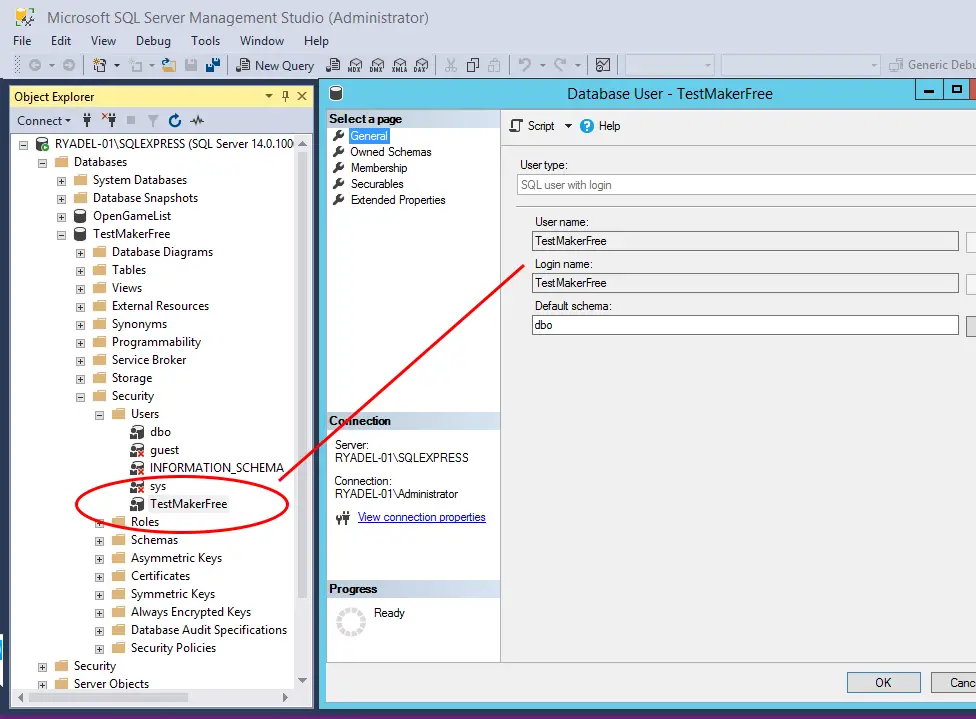
As soon as we click on the OK button, a new TestMakerFree user will be added to the TestMakerFree database with full administrative rights.
We can easily confirm that by going back to the root Databases folder and expanding it to TestMakerFree > Security > Users:
That's it! Now we'll be able to access our brand new TestMakerFree database with a standard connection string using the credentials we just created.
