Table of Contents
If you have stumbled upon this post, it most likely means you are looking for a Data Recovery software: if that's the case, then there's a high chance you have found the right post, since this review and test drive is about one of these products: iTop Data Recovery, a file recovery tool created by iTop, the software company behind iTop VPN service, DualSafe Password Manager, Top Data Protector, and sever other useful IT security solutions.
Before starting to review the software, let's spend a couple of minutes briefly introducing what we actually mean by the term "Data Recovery".
Introduction
In software computing, data recovery is a manual or automated process that allows recovering deleted, inaccessible, lost, corrupted, damaged or otherwise unavailable data that was previously present on a storage device of any kind (HDD, SSD, USB flash drives, SD Cards, magnetic tapes, CDs, DVDs, and so on).
Such a process has become increasingly important over the years, considering the exponential increase in the data used by each of us within the last few decades - which led to a huge increase in the risks of data loss due to human error, hardware failure, or third-party intervention (such as malware or data breaches).
The data recovery process can be simple or complex, depending on the approach used and the damage suffered by the storage device (and/or the data itself). That's precisely why, in the course of the last 10-20 years, we have seen the birth of several data recovery software tools (and even IT companies) specialized in this field. iTop Data Recovery is one of them: let's see how it works.
Installation
The installation process is quite straightforward: the installer can be downloaded from the iTop Data Recovery official page and then executed to start the setup wizard. The user needs to confirm the End-User License Agreement (EULA) and select the installation folder, just like it happens with all software tools. No account info will be asked during that phase, since the product comes with a free trial (more on that later on).
At the end of the installation process, we'll be asked to launch the tool, which will bring us to the iTop Data Recovery main dashboard.
Using the software
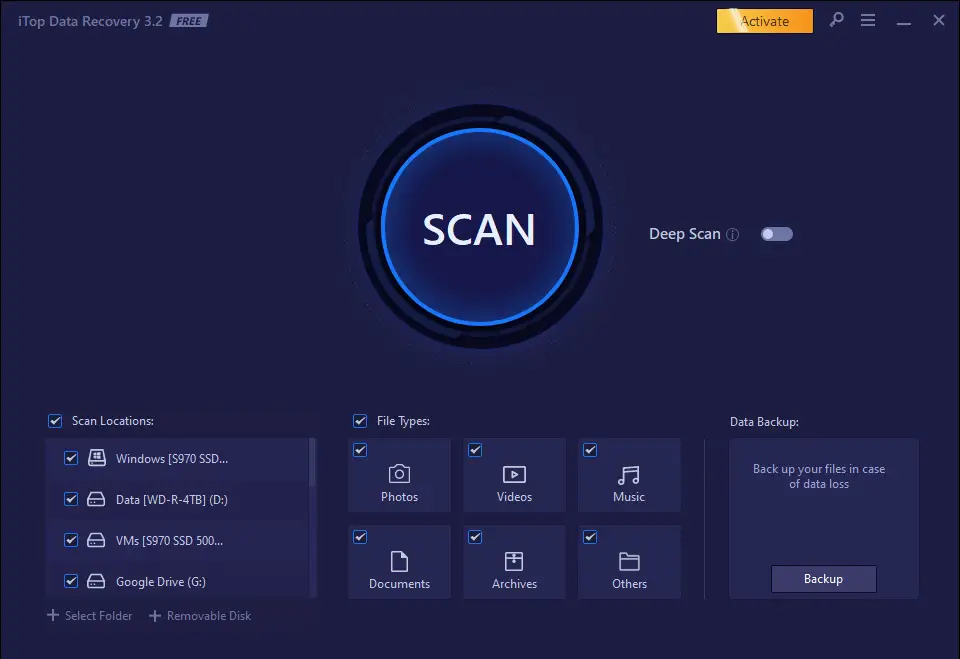
As we can see from the screenshot below, the main dashboard is very intuitive and immediately allows to start working with the recovery tasks.
In the bottom-left side of the screen we do have a list of the available Scan Locations, which is where the software should look for the missing data: notice how the software is already aware of all the storage devices connected to the system. It goes without saying that, in most scenarios, we don't want to leave them all checked, since we probably already know where the missing data should be found - for example, a USB pen drive.
In the bottom-center part of the dashboard we can see the File Types selection panel, which is where we can choose which kind of files the software should limit its search to (thus saving time and resources); again, in most scenarios we should be able to limit the search scope to the types of the missing file we know we are looking for. However, this is not the case when we want to recover a broken drive, where we will likely want to recover any type of recoverable file.
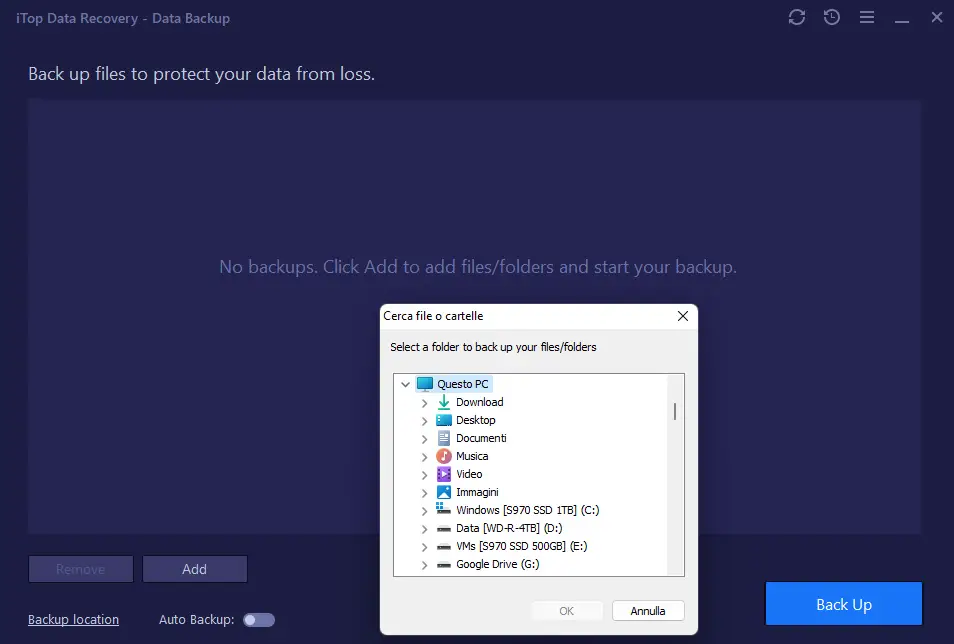
In the bottom-left side of the dashboard we can see another cool feature of the product: the Data Backup panel, with a Backup button that - if pressed - will open a separate dashboard that allows us to manage our personal backups.
This is a simple, yet complete backup solution that we can use to preventively act against data loss in the best possible way - by creating backup tasks. If you don't have a backup solution already, iTop Data Recovery can handle such important requirement for you.
The Data Backup feature comes with built-in support for backup tasks/jobs, automatic backup tasks, and all we can possibly need from a simple, yet easy to use backup solution.
That said, let's come back to the product's main topic: the data recovery feature.
Test Drive
To try out the software, we performed two different test runs:
- The first one, using the FREE edition, to search for some previously-deleted photos from a USB pen drive.
- The second one, using the PAID version, to actually recover the above photos.
Let's see how iTop Data Recovery dealt with these two tasks.
Test #1: Search for missing files
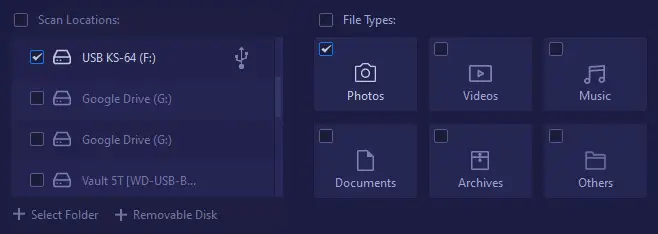
For this test we have used a Kingston Data Traveler 64GB USB 3.0 Pen Drive. once plugged in, the pen drive was immediately reckognized by the software within a few seconds, without the need of restarting the tool or perform a manual scan.
By looking at the above screenshot we can notice how, since we know we want to recover missing photos, we also took the chance to specify that in the File Types panel.
Right after doing that, we activated the software by clicking on the big START button, and waited a few seconds to see the result.
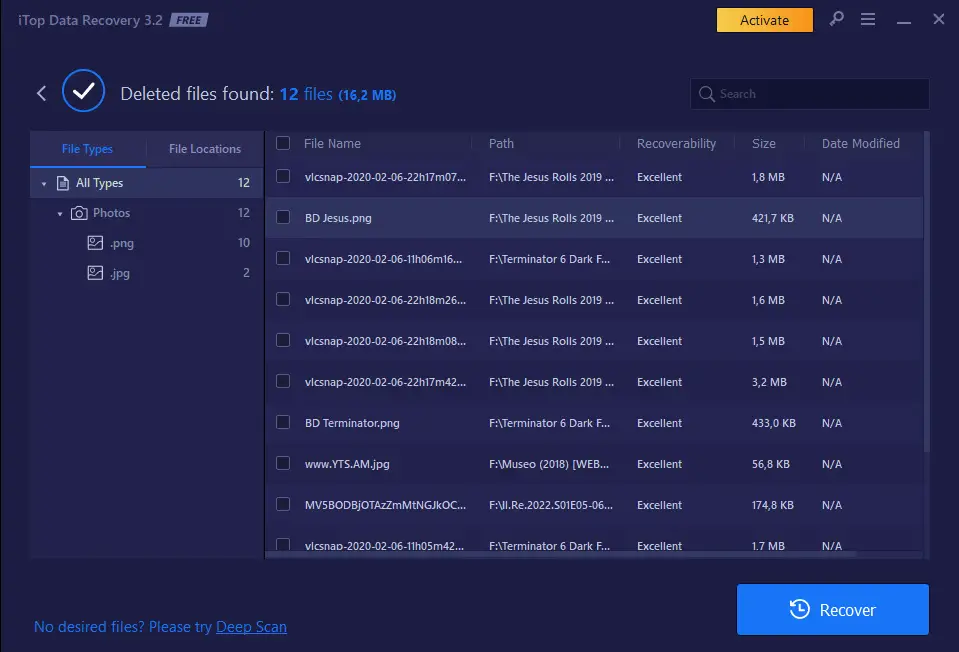
The scan outcome can be seen in the following screenshot:
Notice how the software managed to find twelve (12) recoverable image files: 10 in PNG format, and 2 in JPG format. Also notice how all these files were in a folder (see Path column) which was deleted. It's worth noting that most of those folders were actually deleted more than 3 years ago.
Another thing worth noting there is that the search result was obtained using the Standard Scan, which only takes a few seconds since it doesn't do a sector-by-sector analysis. In case we don't find what we're looking for with the Standard Scan, we can activate the Deep Scan option by clicking on the link in the bottom-left part of the screen.
Such option will perform a sector-by-sector analysis of the device (which can take some minutes, or even hours) but will likely ensure better results.
The next thing we did was trying to to recover the 2 JPG files by selecting them and clicking the Recover button: unfortunately, this cannot be done with the FREE edition, which doesn't allow to recover files. However, that's a typical behavior of the data recovery tools free plan: they show you what they CAN do, leaving you the chance to try their recovery capability on your specific scenario, and then leave you the option of purchasing them (and recover the data you know they have found) or not. That's quite an honest approach, and we can definitely appreciate that.
That said, since we want to recover those photos, we have switched to the PAID version and continued the test.
Test #2: Recover the files
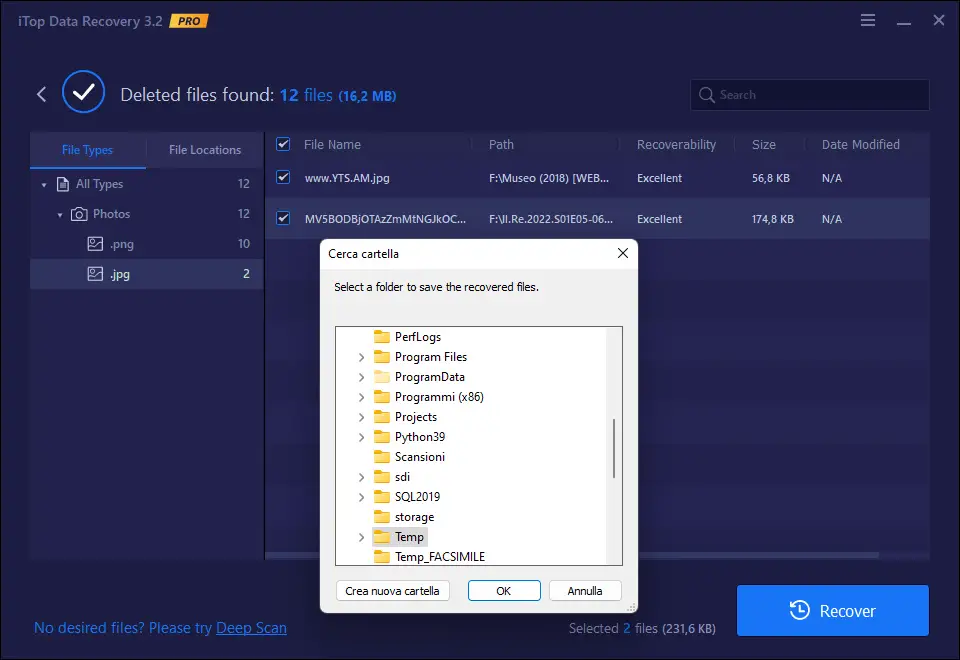
After inserting the serial code, the tool version will switch from Free to Pro, unlocking the data recovery features: this allows us to select the 2 JPG files and click the Recover button to get them back. After doing that, the tool will give us the chance to select the folder where the selected files will be recovered, as shown in the screenshot below:
Once we select the target folder, the recovery process will be performed and the files will be recovered there.
Available Plans
The Pro version of the software can be purchased from the iTop Data Recovery official website. The following plans are available:
- 1-Month: 39,99 €
- 1-Year: 45,99 € (instead of 119,99€) for a limited time
- Lifetime: 69,99 € (instead of 349,99€) for a limited time
Video Tutorial
If you are interested in trying or purchasing the product, you might want to see it in action by looking at the following video tutorial made by the guys at WorldOfGames:
Conclusion
All in all, we can say that iTop Data Recovery has proven to be a solid product that can greatly help non-experienced users (as well as experienced ones) to recover their lost photos, videos, and all other file types, avoiding the risk of losing data due to hardware failures or system crashes: the only minor downside we have found is the fact that the Free Trial version doesn't allow to recover anything: however, that's the same approach followed by the other competitors offering the same features. If we consider how cheap the 1-Month plan actually is, we can still say that iTop Data Recovery is one of the best recovery software tools available on the market, offering an excellent quality-price ratio.

