If you just installed MediaWiki and you want to improve its default text editor, you have basically two options: either enable the WikiEditor extension, which was successfully used by the most MediaWiki-based Wikis in the world since 2015 - including, of course, Wikipedia - or implement the brand-new (and visually astonishing) VisualEditor extension, which is basically the "successor" of the former being officially adopted by Wikipedia since 2015.
Quick comparison
To get an immediate glimpse of what we're talking about, this is the default MediaWiki editor, i.e. what you probably have now:
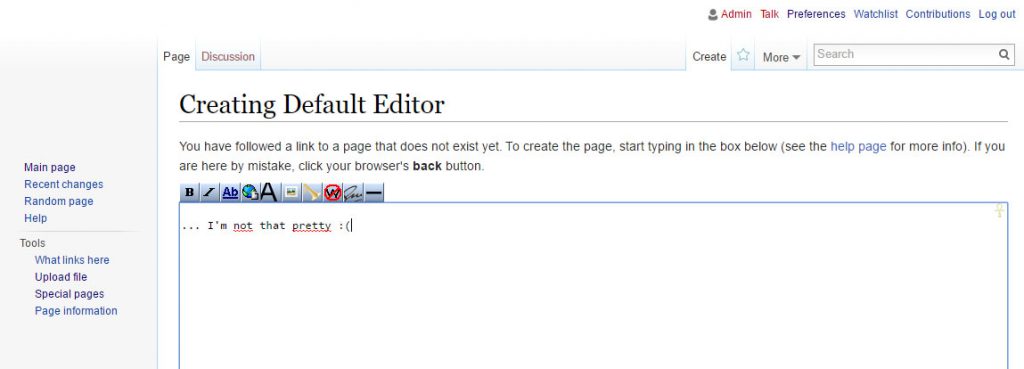
This is the WikiEditor:
And this is is the VisualEditor:
In terms of pure visual appeal, it's pretty clear that we have a winner. However, installing the Visual Editor in your own MediaWiki environment is not a trivial task: other than requiring some experience (and a good amount of time), you need to have the required amount of control over your web site hosting service - or have access to another one you can use - because you'll need to setup some stuff, including a dedicated Node.js instance to run the required Parsoid service.
If you are interested in going for that path, until we'll write an easy-to-understand guide, you can go through the official VisualEditor documentation for installing it within a shared host.
Conversely, installing the WikiEditor is a matter of few minues, which is something that makes it the perfect choice if you want to improve your editor's experience without losing too much time.
Downloading WikiEditor
As a matter of fact, you most likely have it already - unless you installed MediaWiki years ago - as the WikiEditor extension comes shipped together with the default MediaWiki bundle since 1.18 (and above). Just to be sure about that, look inside the /extensions/ folder within your MediaWiki installation and check if the /WikiEditor/ folder is there or not. If that's the case you can skip to the next paragraph, otherwise do the following:
- Download the extension from the MediaWiki Extension Distributor page.
- Unpack the archive within the /extension/WikiEditor/ folder, without creating additional subfolders (the first php files will need to be there).
Installing and configuring
Open the LocalSettings.php file in your MediaWiki installation's root folder and look for the Extensions section, which starts with the following commented lines:
|
1 2 3 |
# Enabled Extensions. Most extensions are enabled by including the base extension file here # but check specific extension documentation for more details # The following extensions were automatically enabled: |
Right after that you'll find a list of wfLoadExtension('SOME_NAME') lines of code, one for each installed extension. Add the following at the end of the list, or uncomment it in case it's already there:
|
1 |
wfLoadExtension('WikiEditor'); |
If you're using MediaWiki 1.24 or older, instead of the wfLoadExtension you will see a list of include statements. That's because the wfLoadExtension method has been added in MediaWiki 1.25. If you need to install this extension in earlier versions, use the following line of code instead of the previous one:
|
1 |
require_once "$IP/extensions/WikiEditor/WikiEditor.php"; |
Testing it out
As soon as you save your LocalSettings.php configuration file, the WikiEditor will replace the default MediaWiki editor for all users. You can easily check it out by creating a new entry or edit an existing one.
That's it for now: happy writing!


