When developing an iOS app you might need to have a few more images or photo in the iOS Simulator device. Unfortunately the process isn't as straightforward as you would expect it to be because the Simulator - unlikely Android emulators - doesn't have any access to your local Mac HDD Drive. Let's see how we can achieve such result.
XCode 6 and beyond
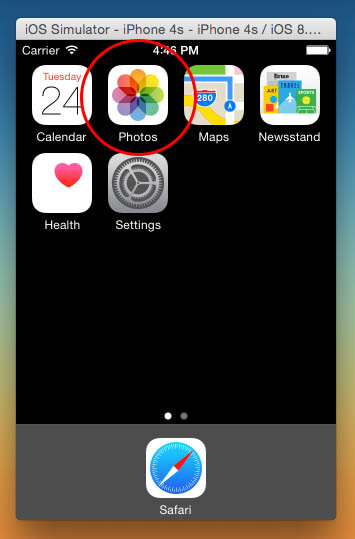
If you're dealing with XCode 6 and above the process is quite easy: all you need to do is to launch the Photo app which is included in the default bundle shipped with the Simulator:
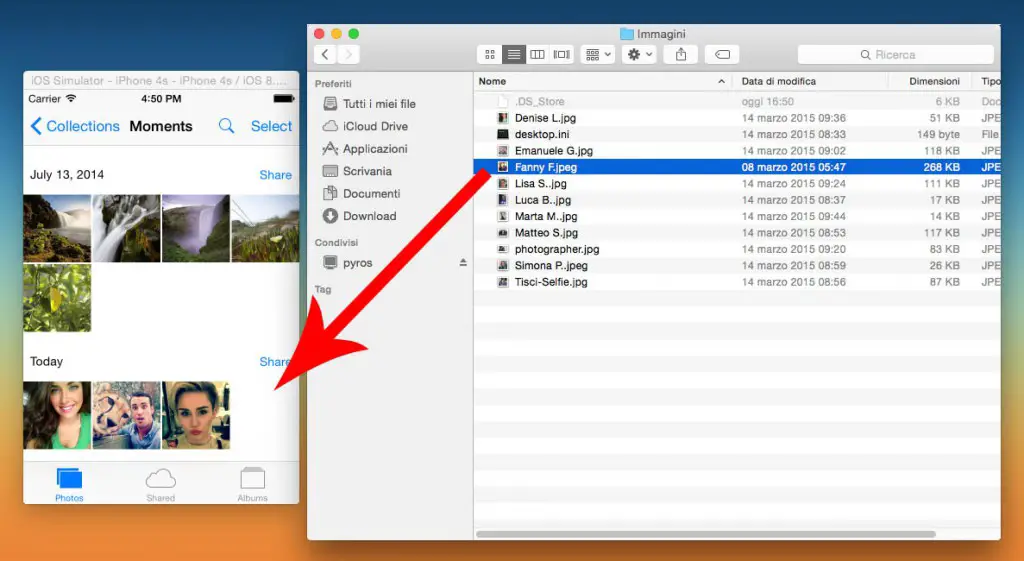
Once you do that, just drag & drop from a Finder window the images you want to add:
XCode 5.x and below
If you're still locked to an earlier XCode version, you can't drag & drop directly to your Photo app. You need to bridge your struff through Safari instead, following the instruction below:
- Drag & drop your image (one at a time) from the Finder window to the iOS Simulator window.
- Wait for Safari to launch: the Simulator should do that automatically. If it doesn't, just launch Safari and start over from step 1.
- Do a long tap on the image opened in Safari to save it inside your Simulator default camera roll.
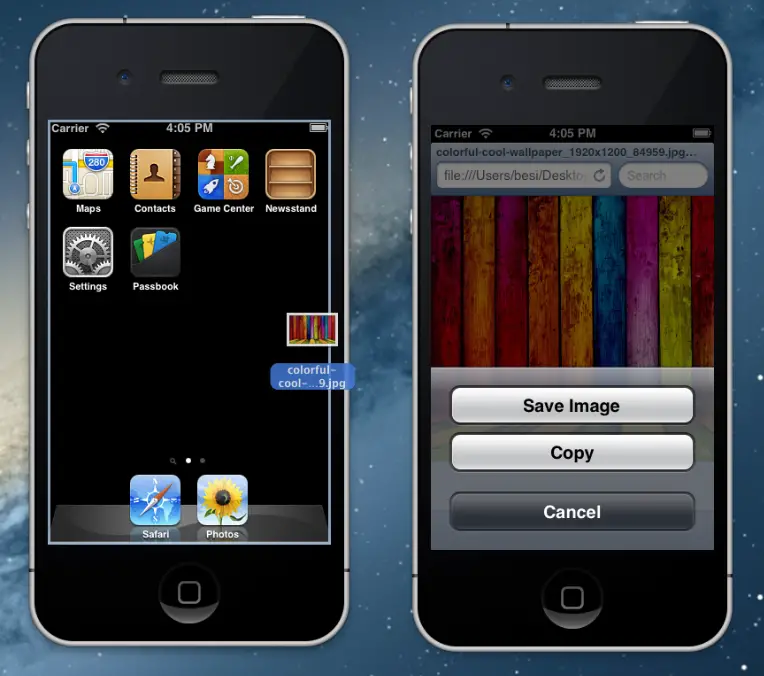
Notice that your image will be put in the following folder of your Mac's HDD:
|
1 |
~/Library/Application Suppport/iPhone Simulator/6.1/Media/DCIM/100APPLE |
You won't be able to drag & drop there tho: the image won't be added to the Simulator Database that way, so it won't appear on your emulated device. If you want to use it from your Simulator you have to stick to the above method.
A special thanks to Besi and to his answer on stackoverflow.com web site!


Thanks! Very useful feature. First I searched official documentation for it, but no luck