Indice dei contenuti
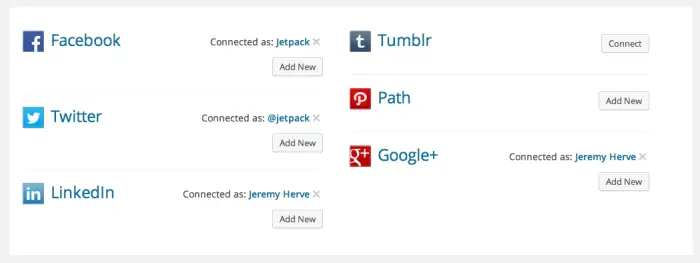
Ho già avuto modo di parlare di Publicize, il modulo di Jetpack che consente di pubblicare una versione condensata degli articoli pubblicati su WordPress sulle pagine dei principali Social Network come Twitter, Facebook, Google+ e altri. A patto, ovviamente, di avere un account su ciascuno di essi e di collegarlo opportunamente secondo le modalità descritte in questo articolo e riassunte dalla schermata seguente:
Una volta completata la configurazione, Publicize provvederà automaticamente a compilare il testo da inviare ai Social Network inserendo il titolo del nostro articolo nell'apposito widget sul lato destro della pagina di inserimento/modifica post, dandoci anche la possibilità di modificarne il contenuto a nostro piacimento.
Questa comodissima funzionalità è una manna dal cielo per la maggior parte dei blogger, tale da rendere senza dubbio Publicize uno dei moduli più utili dell'intera suite Jetpack. Volendo trovare a tutti i costi un difetto si potrebbe dire che, allo stato attuale, le opzioni di configurazione del modulo sono piuttosto scarne. Non c'è ad esempio alcuna possibilità di inserire automaticamente gli hashtag, magari prendendoli dai tag associati all'articolo o da un altro campo personalizzato: funzionalità oltremodo comoda e che comincia ad essere messa a disposizione da molti plugin che si occupano di auto-pubblicazione su social, tra cui l'ottimo Revive Old Post di cui avrò modo di parlare in un prossimo articolo.
Per risolvere il problema ho creato un piccolo plugin che fa esattamente questo. Il suo nome, giusto per essere originali, è...
Utilizzare il plugin è molto semplice: una volta installato, i tag dell'articolo saranno aggiunti al Custom Message presente nel widget di Jetpack Publicize sotto forma di hashtag a seguito di ogni salvataggio, come mostrato dall'immagine seguente:
Come detto, il plugin svolge il suo lavoro ad ogni salvataggio dell'articolo: questo significa che gli hashtag compariranno automaticamente al primo save draft/salva bozza, update/aggiorna, publish/pubblica o altro comando similare. Ovviamente il plugin è dotato di un controllo apposito per impedire l'inserimento di hashtag duplicati, quindi non correrete il rischio che lo stesso hashtag venga inserito più di una volta.
Caratteristiche Principali
- Gli hashtag verranno creati sulla base dei tag assegnati all'articolo, eliminando eventuali spazi.
- La presenza del plugin consente di inserire hashtags manualmente, esattamente come prima e in qualsiasi posizione rispetto a quelli generati automaticamente.
- E' possibile riordinare a piacimento gli hashtag inseriti manualmente e automaticamente.
- Il plugin controlla che lo stesso hashtag non sia inserito due volte dalla procedura automatica.
- Il plugin controlla che la dimensione del Custom Message non superi un certo numero di caratteri (118 per impostazione predefinita). Tale numero può essere modificato manualmente oppure impostato a zero per disattivare il controllo.
Installazione
Il plugin è totalmente gratuito ed è stato rilasciato su licenza GPL v2.0: potete scaricare e/o installare l'ultima versione tramite l'apposita scheda presente nel Plugin Browser di WordPress.
Codice Sorgente
Nel caso in cui siate interessati a dare un'occhiata al codice o a creare una versione personalizzata del plugin, di seguito trovate il codice sorgente della versione 0.1 completo di commenti: sentitevi liberi di modificarlo come più vi aggrada.
|
1 2 3 4 5 6 7 8 9 10 11 12 13 14 15 16 17 18 19 20 21 22 23 24 25 26 27 28 29 30 31 32 33 34 35 36 37 38 39 40 41 42 43 44 45 46 47 48 49 50 51 52 53 54 55 56 57 58 59 60 61 62 63 64 65 66 67 68 69 70 71 72 73 74 75 76 77 78 79 |
/* Plugin Name: Publicize With Hashtags Plugin URI: https://www.ryadel.com/works/publicize-with-hashtags/ Description: Automatically append hashtags to any content sent by Jetpack's Publicize module: hashtags will be created using post tags: dupe check and an optional length-based threshold are also included. Version: 0.1.2 License: GPLv2 or later Author: Darkseal Author URI: https://www.ryadel.com/ */ /* This program is free software; you can redistribute it and/or modify it under the terms of the GNU General Public License as published by the Free Software Foundation; either version 2 of the License, or (at your option) any later version. This program is distributed in the hope that it will be useful, but WITHOUT ANY WARRANTY; without even the implied warranty of MERCHANTABILITY or FITNESS FOR A PARTICULAR PURPOSE. See the GNU General Public License for more details. You should have received a copy of the GNU General Public License along with this program; if not, write to the Free Software Foundation, Inc., 51 Franklin Street, Fifth Floor, Boston, MA 02110-1301, USA. */ // If Jetpack is not installed or Publicize module isn't active, just exit now. if (!class_exists('Jetpack') || !Jetpack::is_module_active('publicize')) return; function publicize_with_hashtags() { // Set an optional character threshold (set to null to disable). // If you set it as a positive integer, hashtags will be appended only until this threshold is reached. // Default is 118, which is good for Twitter considering a default, non-https url length, which is 22 chars as stated by Twitter standards. // For more info, see https://dev.twitter.com/overview/api/counting-characters and https://dev.twitter.com/overview/t.co Twitter official docs. // Suggested values: // 118 if you plan to use only HTTP URLs // 117 if you plan to use both HTTP and HTTPS (or only HTTPS) URLs // 140 if you don't plan to append URL infos to your posts // 0 or <null> or <false>, if you want to tufn-off this check and append hashtags without any char limits - good if you're only using Facebook sharing. $mess_max_length = 118; // Set it to TRUE to strip all spaces when converting Tags to Hashtags, i.e. 'Windows 8' -> '#Windows8', FALSE to keep only first. // Default is TRUE (strip all spaces). $strip_spaces = true; // meta tag used by Publicize to store social message. Change this only if you're really know what you're doing. // If you do and you feel like you should, please contact me so I'll update the plugin aswell. $meta = '_wpas_mess'; $p = get_post(); if (empty($p)) return; // Get the current post social message $mess = get_post_meta($p->ID, $meta, true); // Performance-wise length check: do nothing if we're already out of threshold. if (!empty($mess) && !empty($mess_max_length) && $mess_max_length <= (strlen($mess))) return; // Get the post tags array $ta = get_the_tags($p->ID); // Performance-wise tag check: do nothing if we don't (yet) have tags to process. if (empty($ta)) return; // From now on, we mean business. Let's start by initializing the social message (if needed). if (empty($mess)) $mess = ''; // Create list of tags with hashtags in front of them until threshold is reached foreach ($ta as $t) { // Create the hashtag, stripping spaces if needed. $ht = '#' . (($strip_spaces) ? str_replace(' ', '', $t->name) : $t->name); // only process newly-added hashtags, skipping duplicate ones if (stripos($mess,$ht) === false) { if (!empty($mess_max_length) && $mess_max_length <= (strlen($mess) + strlen($ht))) break; $mess .= ' '.$ht; } } // Update the new social message update_post_meta($p->ID, $meta, $mess); } // Hook the plugin action to 'save_post' handler. add_action('save_post', 'publicize_with_hashtags', 99); |
In alternativa potete consultare direttamente l'ultima versione su GitHub.
Una volta realizzata la vostra build, potrete cimentarvi nell'installazione seguendo i passaggi descritti nell'ottima guida ai functionality plugin di Eric Dye oppure tramite il pratico Functionality Plugin di Shea Bunge.
Link e riferimenti
- Publicize With Hashtags su ryadel.com.
- Scheda del Plugin nel Plugin Browser di WordPress.
- Pagina GitHub del progetto e relativo Source Code Repository.
- Repository SVN del progetto su WordPress.org.
- PayPal Donate Link, nel caso in cui il plugin vi piaccia e vi sentiate particolarmente generosi!


